Who is the plugin for
I built the Post Webhook Plugin for WordPress because I wanted to automatically send key information about my posts and pages into Airtable so that I could further automate my content workflow.
I couldn’t find a free plugin that did this and the paid options (AutomatorWP & WP Webhooks) were expensive for what I needed. So I built my own plugin.
I no longer need to manually update my Airtable table with all the details about my posts & pages, Post Webhook does it all automatically because the plugin sends the data straight to Airtable as soon as I hit Publish or Trash in WordPress.
After using the plugin for a number of months I figured it could be useful for other content creators as well, so I tidied it up a bit and published it on the WordPress Plugin Store. It’s totally free, without any limits, so use it and enjoy it.
You can download it from the WordPress Plugin Directory.
You’re not limited to just using Airtable, the plugin works for any webhook-capable system. So you could use it to send the data wherever you like; Google Sheets, Trello, Clickup, Monday, Asana etc. etc. Some of these tools directly support webhooks, whilst others will need something like Integromat/Make, Zapier, Pabbly etc. sitting in the middle.
What is a webhook
Ok, so I’ve used the term Webhook a few times already and I’m going to be using it more, so for those of you that don’t know what a webhook is here’s a quick, non-technical, explainer.
A webhook simply delivers data from one system to another in real-time when an event happens. So in the case of this plugin, the event is you hitting that publish or trash button in WordPress. The webhook (this plugin) then delivers the data shown below, to a URL which is provided by the system receiving the data.
What data does Post Webhook send
Here’s the data the plugin sends.
For Published or Updated posts and pages:
[message] => Post #359 has been published with title – Test Post
[author_display_name] => jon
[post_ID] => 359
[post_title] => test post
[post_date] => 2022-10-17 11:57:13
[post_modified] => 2022-10-17 11:57:13
[post_guid] => http://jonathan-wright.com/?p=359
[post_slug] => test-post
[permalink] => http://jonathan-wright.com/test-post/
[post_type] => post
[post_status] => publish
[post_categories] => automation, seo
[post_tags] => tag1, tag2
[post_word_count] => 106
For Deleted posts and pages:
[message] => Post #359 has been trashed with title – Test Post
[post_ID] => 359
[post_modified] => 2022-10-17 11:57:37
[post_guid] => http://jonathan-wright.com/?p=359
[post_status] => trash
How do I set up Post Webhook
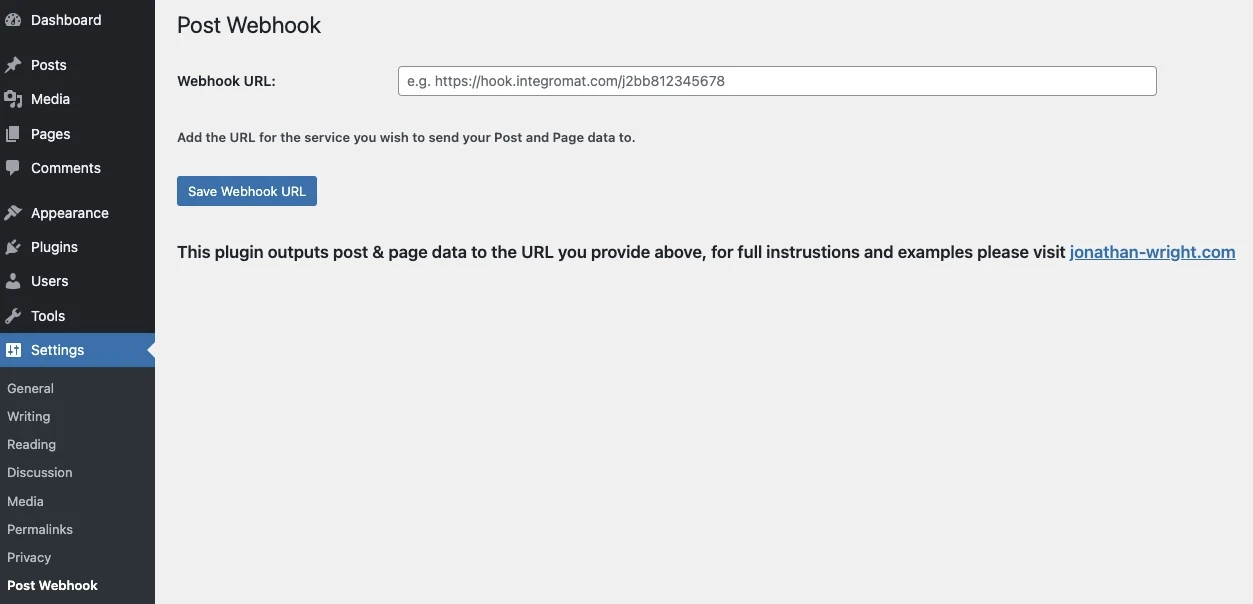
I have tried to make the plugin as simple to use as possible, in fact, there is only one thing you need to do once you have installed it and activated it and that’s provide it with the URL you want to send the data to. That’s it, once you’ve done that the next time you publish a new post or delete a previously published post the data will be sent to the webhook.

Notes for new Post Webhook plugin users
- It only sends data when a post or page is Published or Trashed
- It does not send any data if a post/page is saved as Draft, Previewed etc.
- It only sends data for trashed posts/pages that were previously published e.g. if you save it as a draft and then trash it, you won’t get any data
- It only sends data for posts or pages that are published or deleted after the plugin is installed and setup i.e. if you have existing live posts it will not send that ‘historical data’
The first three bullets above are deliberately by design on my part, I don’t want to track data for posts/pages that weren’t published and I doubt most of you will either.
The last bullet point is due to the way webhooks work. If you want to populate your system (Airtable, Google Sheets etc.) with your existing data to start with then you will need to download it from WordPress with a plugin such as WP All Export (which is free for this use).
Integration Guides
I plan on creating a series of articles on how to use the plugin to connect WordPress with various systems, here are the systems covered so far:
Conclusion
What you do with your data once you get it across to your system is totally up to you and I’m sure many of you will have uses for this plugin that I haven’t even dreamed of. I’m always interested to hear of the new and innovative things people are doing with it, so please leave a comment below if you’ve built something amazing.